
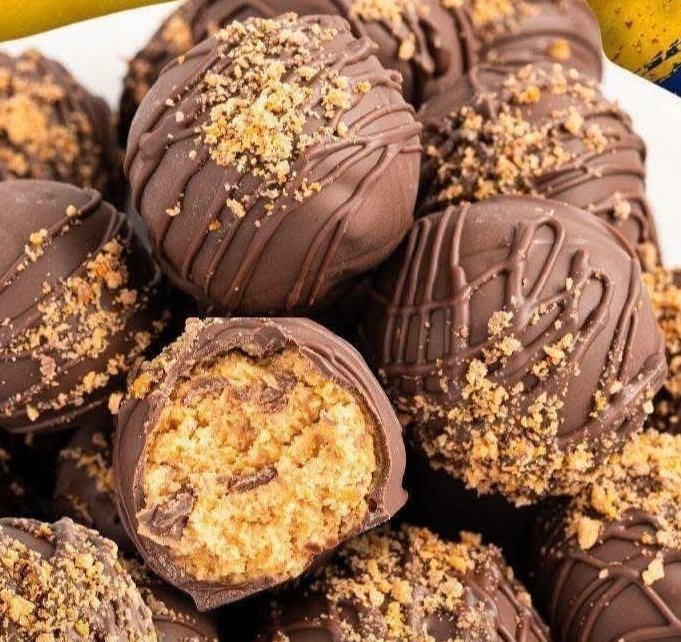
# NO BAKE BUTTERFINGER BALLS
If you’re looking for a quick, easy, and delicious treat that requires no baking, look no further than No Bake Butterfinger Balls. This delightful dessert combines the rich taste of chocolate with the crunch of Butterfinger candy bars, creating a perfect snack for any occasion. In this article, we’ll explore the ingredients, the simple preparation process, and some variations to try, all while ensuring that you have a fun and enjoyable cooking experience without the need for an oven.
## What Are No Bake Butterfinger Balls?
No Bake Butterfinger Balls are bite-sized treats made primarily from crushed Butterfinger candy bars, peanut butter, and some additional ingredients to create a dough-like consistency. These treats are coated in chocolate and refrigerated until firm, making them a fantastic dessert option for parties, holidays, or casual snacking. They’re also a great choice for those who want to avoid traditional baking, whether due to time constraints or simplicity.
## Ingredients for No Bake Butterfinger Balls
### Main Ingredients
To prepare these delightful treats, you’ll need the following ingredients:
1. **Butterfinger Bars**: Approximately 10 full-size bars, crushed.
2. **Creamy Peanut Butter**: 1 cup, providing rich flavor and binding the mixture together.
3. **Powdered Sugar**: 1 cup, which adds sweetness and helps achieve the right texture.
4. **Vanilla Extract**: 1 teaspoon, enhancing the overall flavor.
5. **Chocolate Chips**: About 1 to 2 cups for coating the balls. You can use semi-sweet, milk chocolate, or even white chocolate for a different twist.
### Optional Ingredients
You might consider including some optional ingredients to customize the flavors:
– **Chopped Nuts**: For added crunch; crushed peanuts or almonds work well.
– **Sea Salt**: A sprinkle of sea salt can elevate the flavor profile.
– **Mini Marshmallows**: Adds a chewy texture if you prefer a more varied bite.
## Step-by-Step Preparation Guide
Creating No Bake Butterfinger Balls is as easy as mixing a few ingredients together. Follow these simple steps to whip up your batch.
### Step 1: Crush the Butterfinger Bars
Start by unwrapping the Butterfinger bars and breaking them into small pieces. You can place them in a zip-top bag and crush them with a rolling pin, or use a food processor for a finer texture. The choice depends on how crunchy you prefer the final product.
### Step 2: Mix the Ingredients
In a large mixing bowl, combine the crushed Butterfinger, peanut butter, powdered sugar, and vanilla extract. Use a spatula or your hands to mix everything until a cohesive dough forms. If the mixture is too dry, add a splash of peanut butter; if too sticky, add a bit more powdered sugar.
### Step 3: Shape the Balls
Once the mixture is well-combined, take small amounts—about a tablespoon each—and roll them into balls using your hands. Place the rolled balls on a baking sheet lined with parchment paper.
### Step 4: Chill the Balls
Place the baking sheet in the refrigerator for about 30 minutes. Chilling helps the balls firm up and hold their shape better when you coat them in chocolate.
### Step 5: Coat with Chocolate
Melt chocolate chips in a microwave-safe bowl in 30-second increments, stirring after each interval, until smooth. Then, take each chilled ball and dip it into the melted chocolate using a fork, ensuring it’s fully coated. Shake off any excess chocolate before placing the balls back on the parchment-lined baking sheet.
### Step 6: Final Chill
Once all of the balls are coated, return them to the refrigerator to set the chocolate, approximately 30 more minutes. If you would like to add any toppings like crushed nuts or sprinkles, now is the time to do so before the chocolate hardens.
## Storing No Bake Butterfinger Balls
After your No Bake Butterfinger Balls have set and hardened, store them in an airtight container in the refrigerator. They can last up to a week, although we’re certain they’ll be gone much sooner! If you want to keep them for longer, consider freezing them. Simply place them in a single layer in a freezer-safe container, and they can last up to three months.
## Tips for Success
– **Quality Ingredients**: Use high-quality Butterfinger bars and chocolate for the best flavor.
– **Room Temperature Peanut Butter**: Ensure your peanut butter is at room temperature for easier mixing.
– **Experiment**: Feel free to experiment with different coatings like almond bark or drizzle colored chocolate for festive occasions.
## Variations to Try
### Flavored Butterfinger Balls
You can swap out the Butterfinger bars for other candy bars if you’re feeling adventurous. Consider using Reese’s Cups instead of Butterfinger for an equally delectable flavor.
### Vegan Option
To make No Bake Butterfinger Balls vegan, substitute the chocolate chips with dairy-free chocolate and use natural sweeteners like maple syrup instead of powdered sugar.
### Healthier Alternative
For a healthier twist, try using nut butter alternatives, like almond or cashew butter, and incorporate oats for added texture and health benefits. While it may alter the traditional flavor slightly, it can make a nutritious snack!
## Conclusion
No Bake Butterfinger Balls are a simple, delightful treat that can bring joy to any occasion. With just a few common ingredients and minimal effort, you can create a crowd-pleaser that’s rich and satisfying. Whether you’re treating yourself or sharing with family and friends, this easy recipe delivers all the joy without the hassle of baking. So, gather your ingredients and create these delicious No Bake Butterfinger Balls today!