
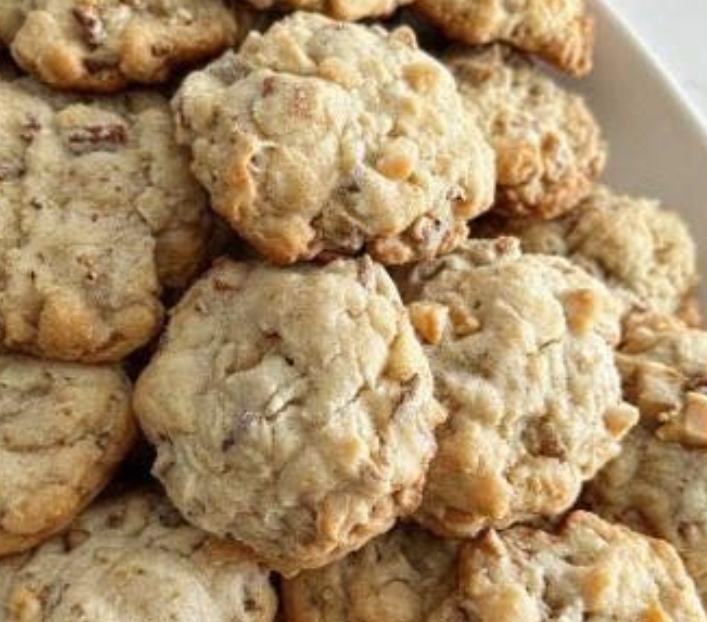
Now, I know last time we talked about a fun, modern cake-mix shortcut for “German Rocks.” But today, I’m doing something special. I’m opening the actual, dusty 1940s recipe box from the back of my cupboard to share Aunt Betty’s true, original treasure.
Don’t let the name fool you—these aren’t hard, crunchy boulders. These beloved old-fashioned cookies are tender, cake-like drop cookies with a delicate crumb, a subtle warmth, and a gorgeous, crackled sugar top. They are reminiscent of a classic German Streuselkuchen or an American tea cake.
Tucked away in Aunt Betty’s recipe box, this 5-ingredient gem was her absolute go-to for church suppers, neighbor gifts, and rainy-day baking. Living alone at 73, I find that baking on a rainy afternoon is one of life’s greatest comforts. There are no fancy tools required, no chilling the dough, just buttery simplicity that melts in your mouth.
Grab your favorite mug of warm ginger tea, because we’re about to bake up a batch of pure, nostalgic history!
Why This Recipe is a Total Game-Changer
As someone who truly appreciates the science behind good cooking, I have to tell you that the secret to this cookie’s “cake-like” texture is all about aeration and gluten control.
When you cream the butter and sugar together, you aren’t just mixing them; you are physically beating thousands of tiny air bubbles into the fat. When these cookies hit the hot oven, those air bubbles expand, giving the cookie a magnificent, tender lift. Meanwhile, by stirring the flour just until it disappears, we prevent the gluten proteins from over-developing. The result? A delicate, melt-in-your-mouth crumb rather than a tough, chewy cookie. It’s a perfect textural contrast achieved with almost zero active effort!
Ingredients You’ll Need
The beauty of this recipe is its absolute simplicity. You likely have everything you need right in your pantry.
The Core Staples:
- 1 cup (2 sticks) unsalted butter: This must be softened to room temperature. Substitute: If you need to be dairy-free, a high-quality vegan butter stick works, but real butter gives that nostalgic flavor.
- 1 ½ cups granulated sugar: For that classic sweetness and the crackled top.
- 2 large eggs: Room temperature is crucial here so they blend smoothly and don’t curdle the butter.
- 2 ¾ cups all-purpose flour: The structural base. Substitute: A 1:1 gluten-free baking flour works beautifully if you need these to be gluten-free.
- 1 tsp baking powder: For that gentle, cake-like lift.
- ½ tsp salt: To balance the sweetness and wake up the butter flavor.
- 1 tsp pure vanilla extract: For that warm, bakery-style aroma.
The “Crackled Top” & Optional Flavor Boosters:
- Coarse sugar (for topping): This is the secret to that signature crackled, sparkling crust!
- Optional: ½ tsp almond extract, 1 tbsp lemon zest, or my personal favorite—1 tsp of ground ginger for a warming, circulation-boosting kick!
Step-by-Step Instructions
Let’s get baking! I promise this process is incredibly relaxing and straightforward.
1. Cream the Butter & Sugar (The Science Step!)
In a large mixing bowl, add your softened butter and granulated sugar. Using a hand mixer or a stand mixer, beat them together on medium-high speed for 2 to 3 full minutes. Science tip: Don’t rush this! The mixture should transform from yellow and gritty to pale, fluffy, and almost white. This aeration is what gives the cookie its delicate, cake-like crumb.
2. Add Eggs & Vanilla
Add the eggs one at a time, beating well after each addition. Mix in the vanilla extract (and almond extract or lemon zest, if using). Scrape down the sides of the bowl to ensure everything is perfectly emulsified.
3. Fold in the Dry Ingredients
In a separate bowl, whisk together the flour, baking powder, and salt. Gradually add the dry ingredients to the wet mixture. Switch to a wooden spoon or a rubber spatula and stir just until the flour disappears. Crucial tip: Stop mixing the second you no longer see white streaks of flour! Overmixing will make the cookies tough instead of tender.
4. The “Aunt Betty” Chill (If Needed)
If your kitchen is warm and the dough feels very soft or sticky, pop the bowl in the fridge for 15 minutes. This helps the cookies hold their beautiful round shape in the oven. If your dough is firm, you can skip this!
5. Drop and Top
Preheat your oven to 350°F (175°C) and line a baking sheet with parchment paper. Drop the dough by rounded tablespoonfuls onto the sheet, spacing them about 2 inches apart. Before baking, sprinkle the top of each cookie generously with coarse sugar. This sugar will catch the moisture, melt slightly, and create that gorgeous, crackled, sparkling crust as it bakes.
6. Bake to Golden Perfection
Bake for 10 to 12 minutes. You are looking for the edges to be just barely set and lightly golden, while the centers still look soft and puffy. They will finish setting up on the hot pan outside the oven.
7. Cool and Serve
Let the cookies rest on the baking sheet for exactly 5 minutes before transferring them to a wire rack. Serve them warm!
Pro Tips, Variations & Serving Ideas
Quick Tips for Success
- Room Temperature is Non-Negotiable: If your butter is cold, it won’t trap the air bubbles. If your eggs are cold, they will seize the butter into little clumps. Take them out of the fridge an hour before you start!
- Use a Cookie Scoop: For perfectly uniform cookies that bake at the exact same rate, use a medium cookie scoop.
Fun Variations to Try
- The “Circulation Booster” Ginger Sugar: Since I am always looking for ways to support my veins and keep those unexplained purple blotches at bay, I love mixing 1 teaspoon of ground ginger into the coarse sugar I sprinkle on top. Ginger is a wonderful, natural anti-inflammatory that supports healthy blood flow, and it adds a beautiful, warming spice to the sweet cookie!
- Lemon Poppyseed: Add the lemon zest from the optional list, and fold 1 tablespoon of poppy seeds into the dough for a bright, springtime variation.
How to Serve and Gift It (The Interactive Tea Bar!)
Since I love desserts that can be easily customized and served in a relaxed format, these cookies are perfect for a self-serve afternoon tea station.
Arrange the cookies on a beautiful vintage cake stand. Because I love preparing homemade treats that are visually appealing and special enough to be appreciated by friends, I always set aside a batch for gifting. I place three or four cooled cookies into small, sterilized mason jars, tie a piece of rustic twine around the lid, and tuck a sprig of fresh rosemary under the string. They make the most beautiful, thoughtful hostess gifts!
Since I always enjoy pairing my desserts with a warm beverage, these rich, buttery cookies pair absolutely beautifully with a hot cup of Earl Grey tea, a cozy chai, or my favorite warm ginger honey tea. The warmth of the beverage melts the buttery crumb just a little bit, creating an unforgettable bite!